Often the main roadblock to better experiences is that we just don’t know enough about our visitors. There are two ways to solve this problem; either take the difficult road and wait for subtle signals of intent or simply ask:
- Who are you?
- Why are you here?
- What are your needs?
To help you gather this information, we added a self-segmentation functionality to our components. It's an easy way to survey your visitors with a single question and to group them into audiences.
This allows you to optimize the digital journey of each visitor, personalize your content, explain your product from their perspective, and highlight the right features. On top of that, self-selection gives you a better understanding of how your website traffic is composed and who your best-converting visitors are. To read more about how powerful this tool can be, take a look at the case study about ClassTag, a customer that increased conversion rate by 150% using self-segmentation.
How to set up a component with self-segmentation
1. Decide on the question
Self-selection is a subtle tool to better understand your visitors. What the question will be, highly depends on your website and your goal. Here are some examples:
- What are you interested in?
- What industry are you in?
- What is your job title?
- What brings you here today?
- What feature is most important to you...
- Are you a buyer or a seller?
When the visitor chooses one of the provided answers, they will be assigned to the corresponding audience.
2. Define corresponding audiences
As the name suggests, self-segmentation means that the answer a visitor chooses will define the audience they join. So, before you create a component with self-segmentation functionality, make sure you have the necessary audiences in Unless. If you'd already set the audiences based on various targeting conditions, you're good to go.
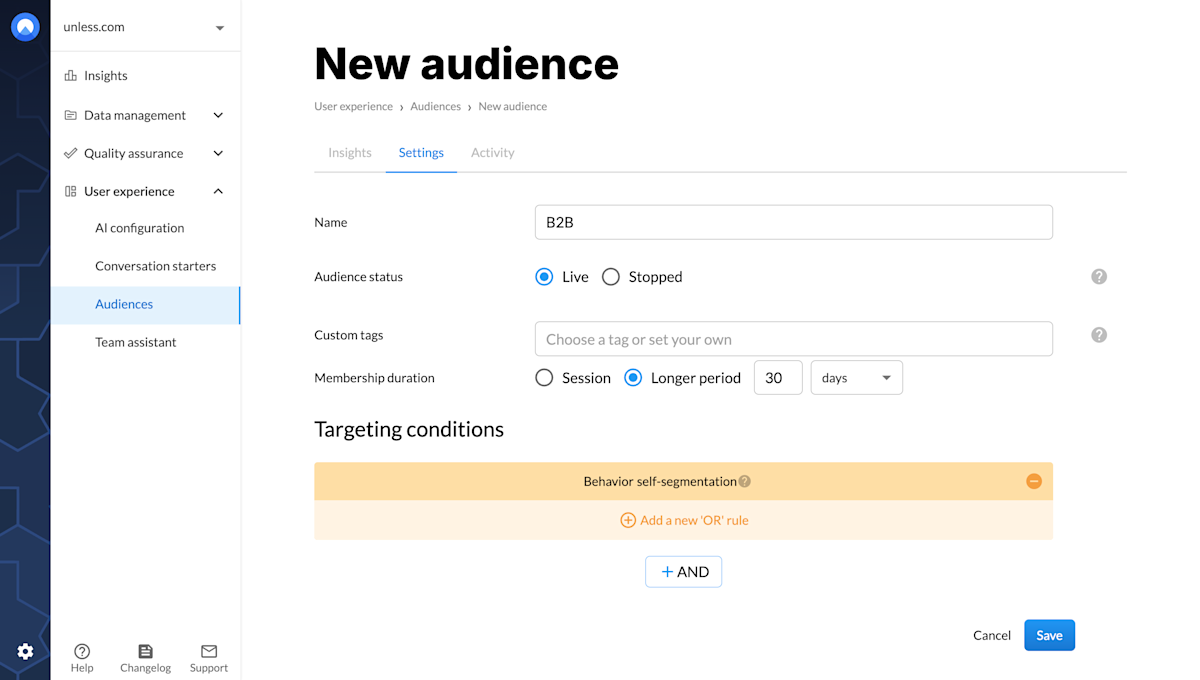
If there are no other conditions to a visitor joining a particular audience, other then them segmenting themselves, here's what you can do. Under targeting conditions, select Behavior, and then Self-segmentation. That's it!
Make sure to give your audience a defining name. Choosing a generous membership duration (e.g. 30 days) will help you better understand how your website traffic is composed. Your audience could look similar to the screenshot below.
Tip: If for some of your visitors, you already know which audience they belong to, you can exclude them from this particular experience. Optionally, you can still include them if you'd like to have the confirmation or just to double check.
3. Set up your component
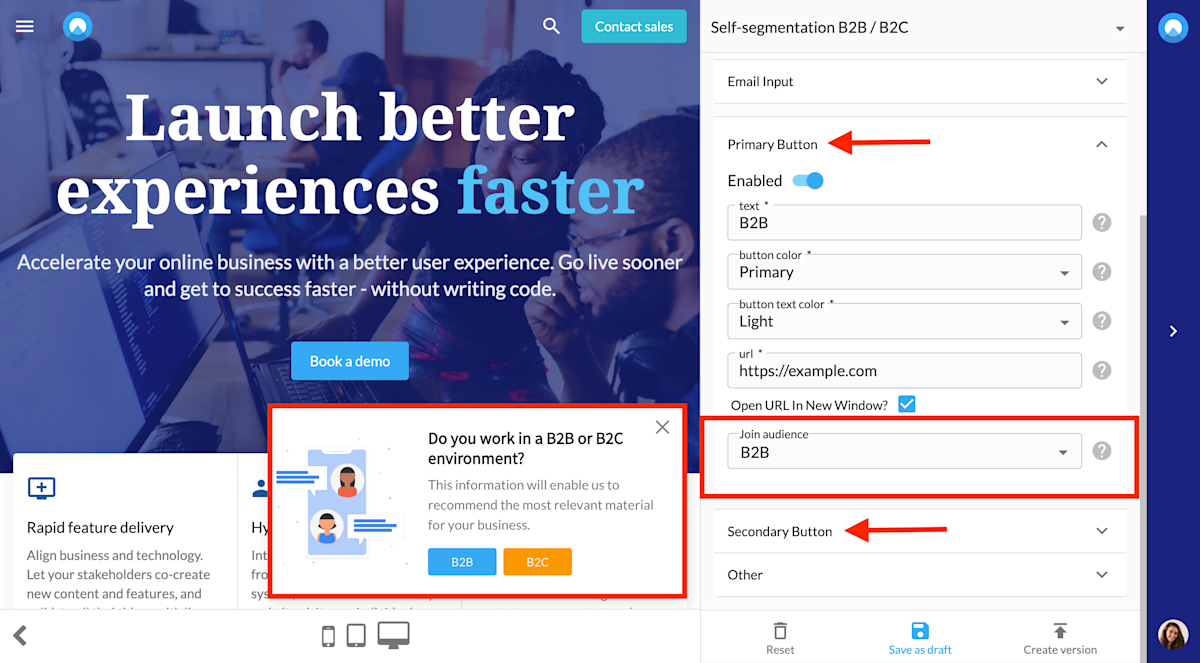
Then its time to set up your component! The general steps for this have been explained in individual articles about inline and overlay components so here we will focus specifically on the self-segmentation aspect.
The panel on the right will have two fields of interest to us: primary and secondary buttons, though here that classification is less important. Under each button you will see an option to enable them and to "Join audience". Here, you can select your desired audience(s) from a dropdown, and that's it! Adjust the copy, the visuals, the links etc. Make sure you save your draft, create version, and publish. Now, when a visitor sees this component and clicks on one of the buttons, they will automatically join the corresponding audience. You can then get to optimizing the rest of their journey accordingly.